How to use Azure DevOps to connect to Azure services across accounts?
Azure DevOps to connect to Azure services across accounts
Since the private projects in the newly applied Azure DevOps account do not enjoy the 1800 minutes of free time provided by the hosting agent and do not want to spend money, we can only think of another version to solve the problem of no parallel operations.
Change in Azure Pipelines Grant for Private Projects
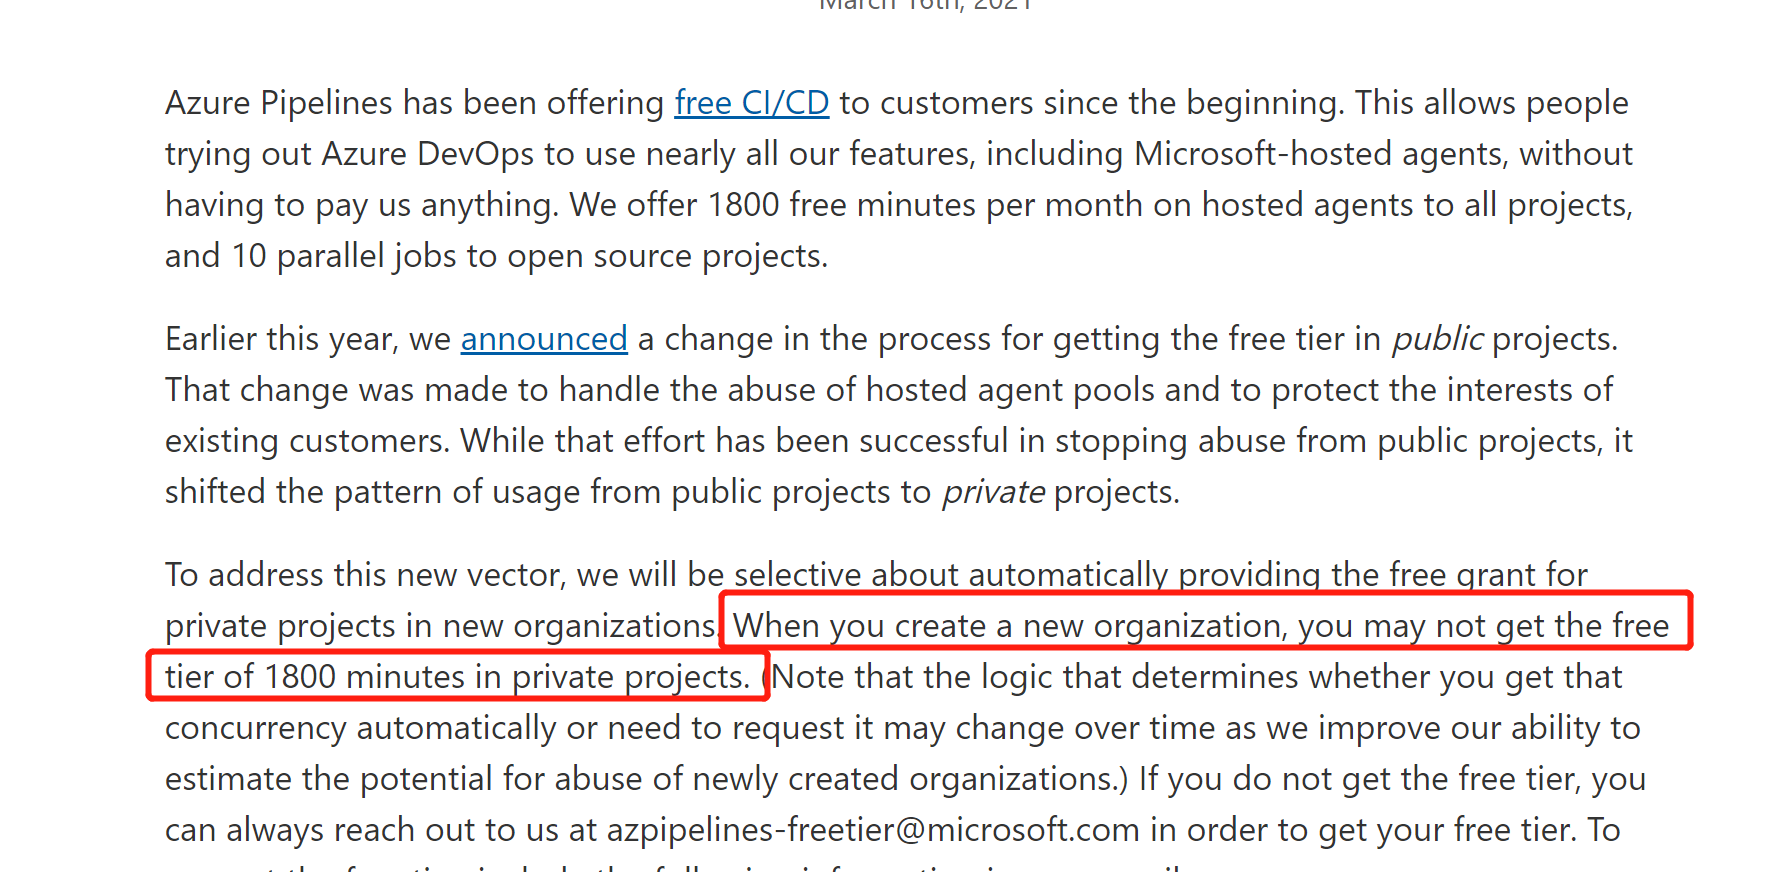
Therefore, we can only use the old Azure DevOps to connect to the subscription of the new Azure account. Through my investigation. The association between Azure DevOps and Azure is that you can manually manage Service connections on Azure DevOps. That being the case, we tried to manually manage the service connection of type “Azure Resource Manager”.
Second, the text
1. Create an available Service Principal and set its permissions
1.1, create a service principal
The way to create Service Principal (service principal), I have talked about before, you can log in to Azure through Azure CLI, use az sp create ……. to create, you can also create manually, today we manually demonstrate How to create a Service Principal.
First, we log in to Azure Portal, register the application on Azure Active Directory, and click “Azure Active Directory” on the left menu of the homepage
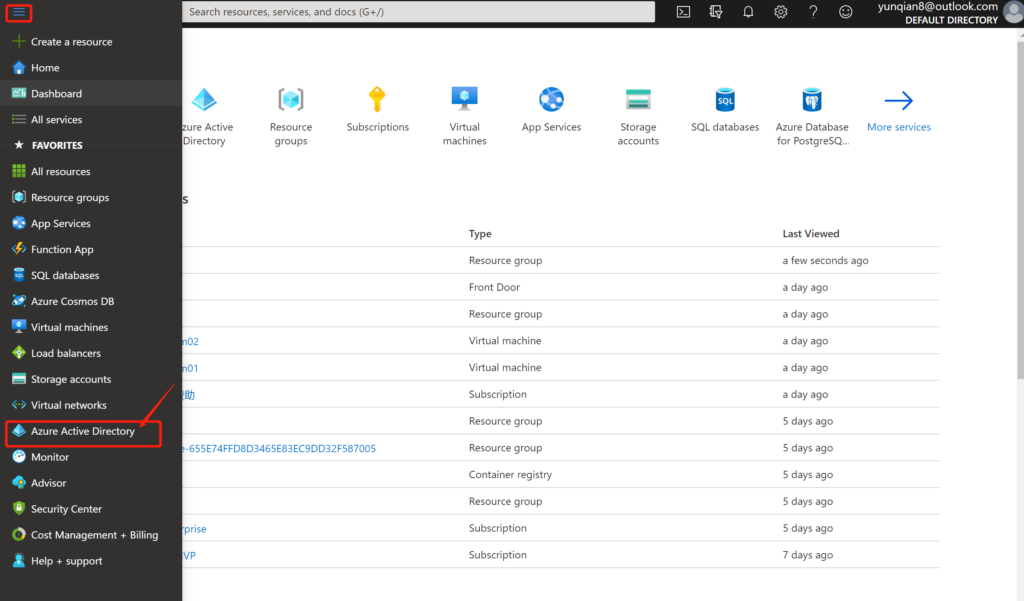
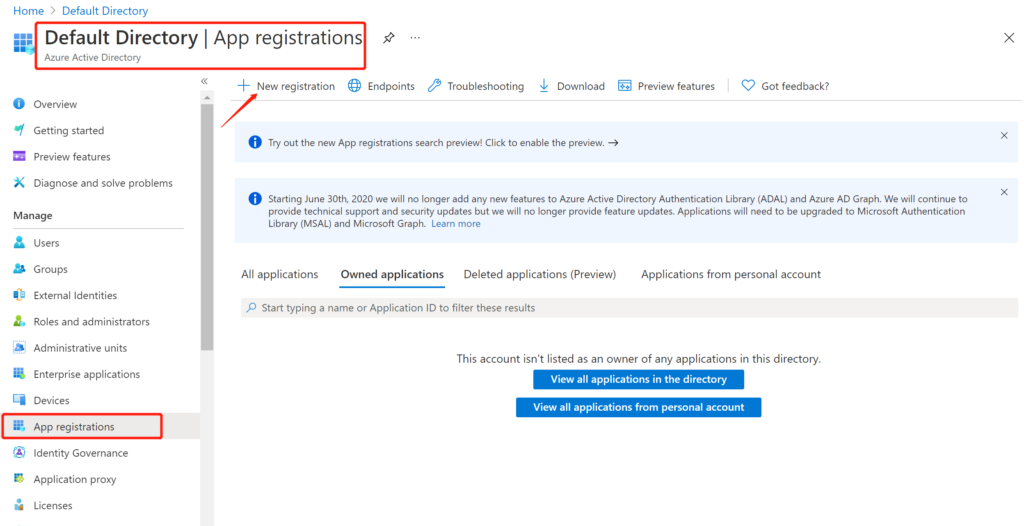
Select “Manage=》App registrations” and click “+ New registration” pointed by the arrow
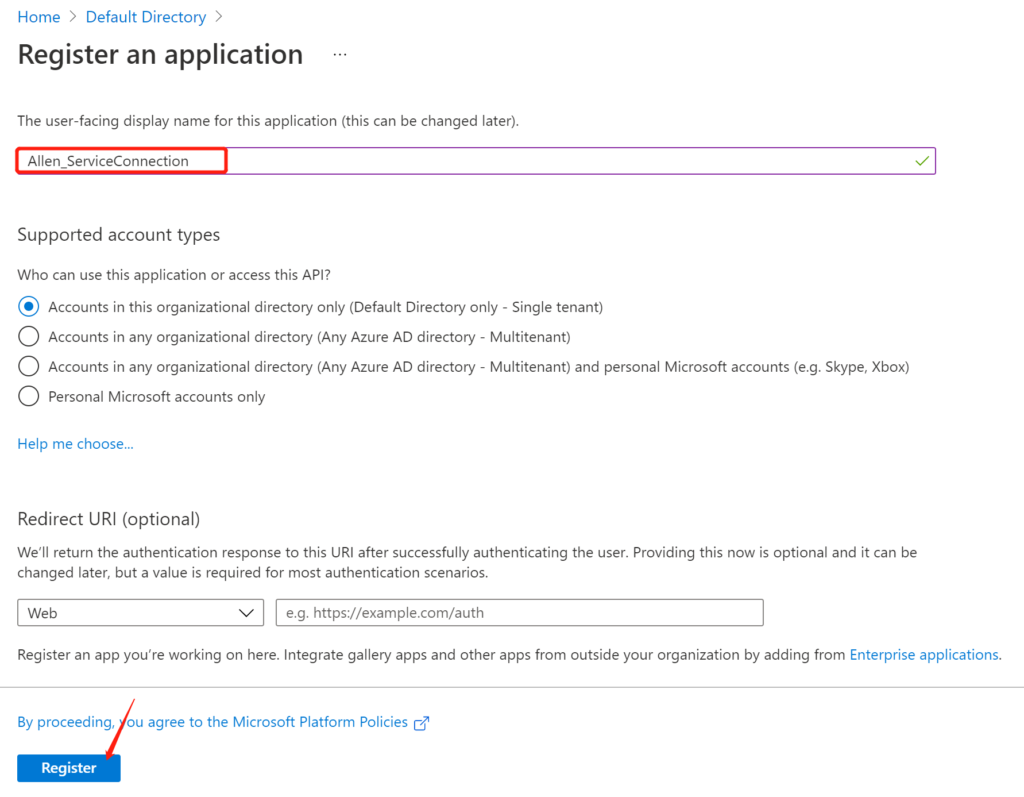
Enter the display name “Allen_ServiceConnection” and click “Register”
After the creation is complete, you can jump to the currently registered application page. Next, we need to create a password for the current application
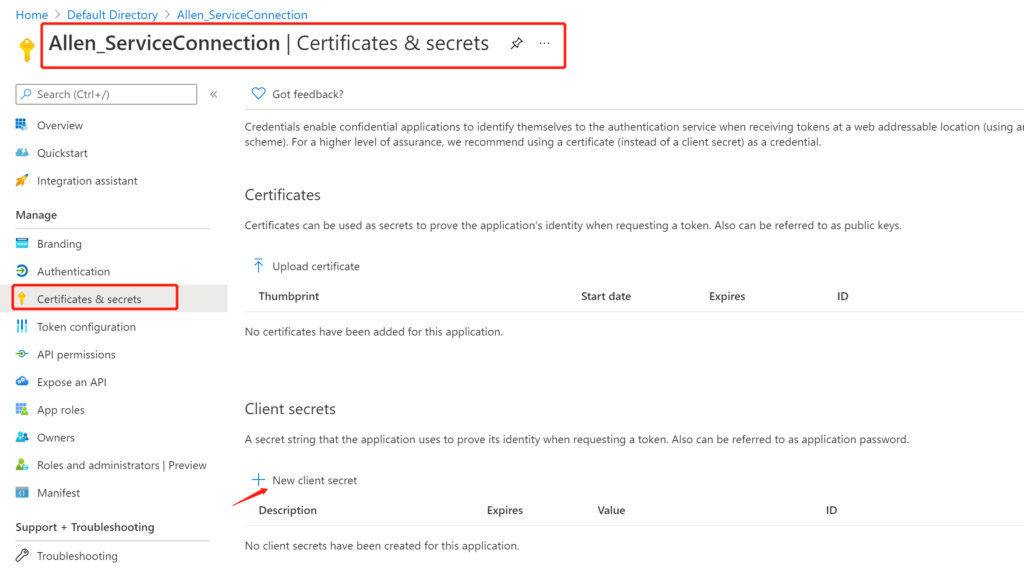
Select “Manage=”Certificates & secrets”, click “+ New client secret”
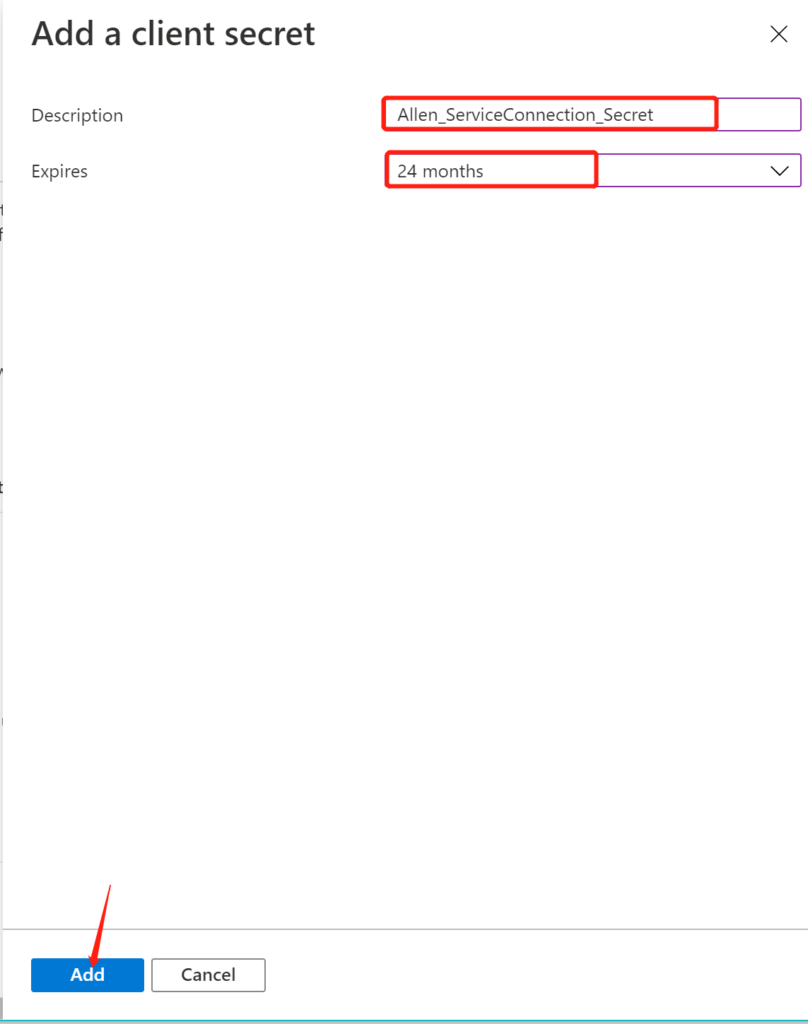
In the add client key page, we need to enter the relevant parameters
Description: “Allen_ServiceConnection_Secret”
Expires: “24 months” (you can choose the expiration time according to your actual situation)
Click “Add”
After the creation is complete, we copy the value of the client key of the current application as soon as possible (remember). Once the page is refreshed and switched to the current page, we can no longer copy the value of the key.

1.2, set the permissions of the Service Principal
We all know that when using the Azure CLI to create an sp, the role given is ” Contributor ” and the scope is ” current subscription “. Similarly, we also need to manually add corresponding permissions for the current application
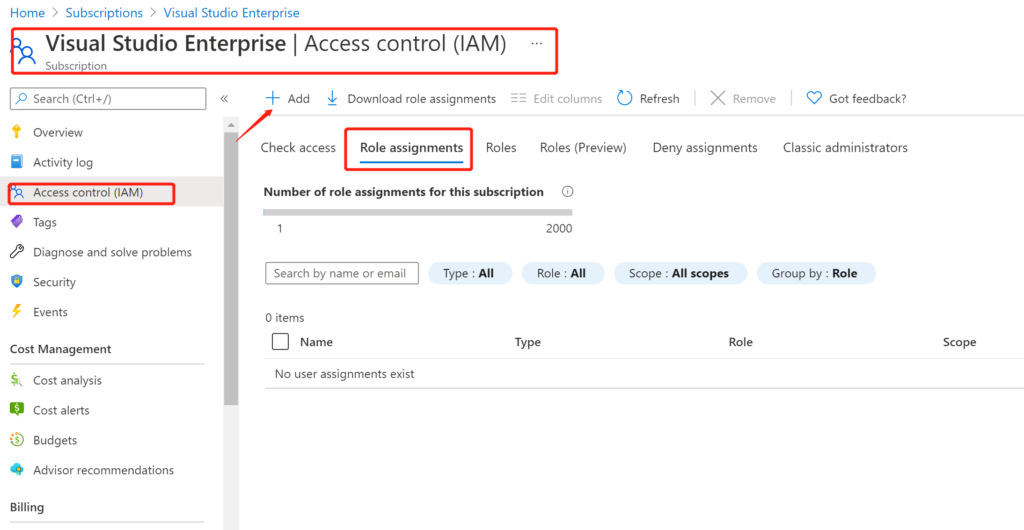
Find the current subscription, select “Access control”, switch to “Role assignments”, click “+Add”
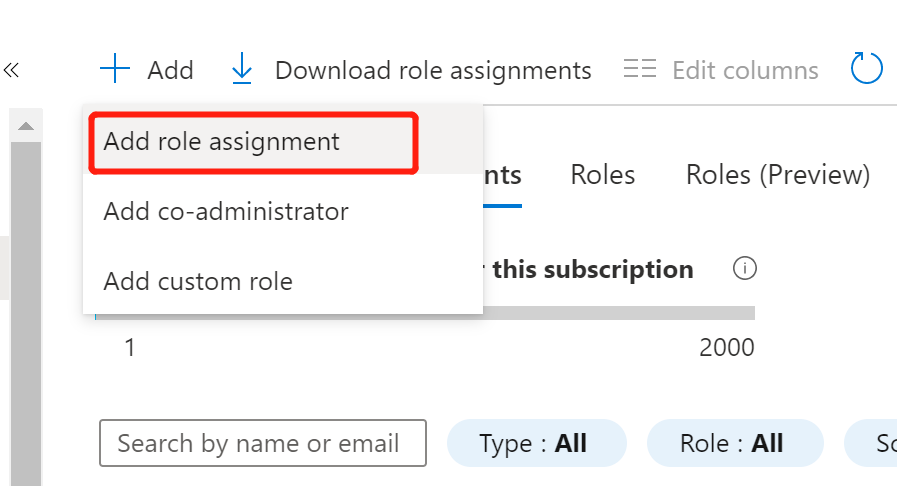
Click “Add role assignment”
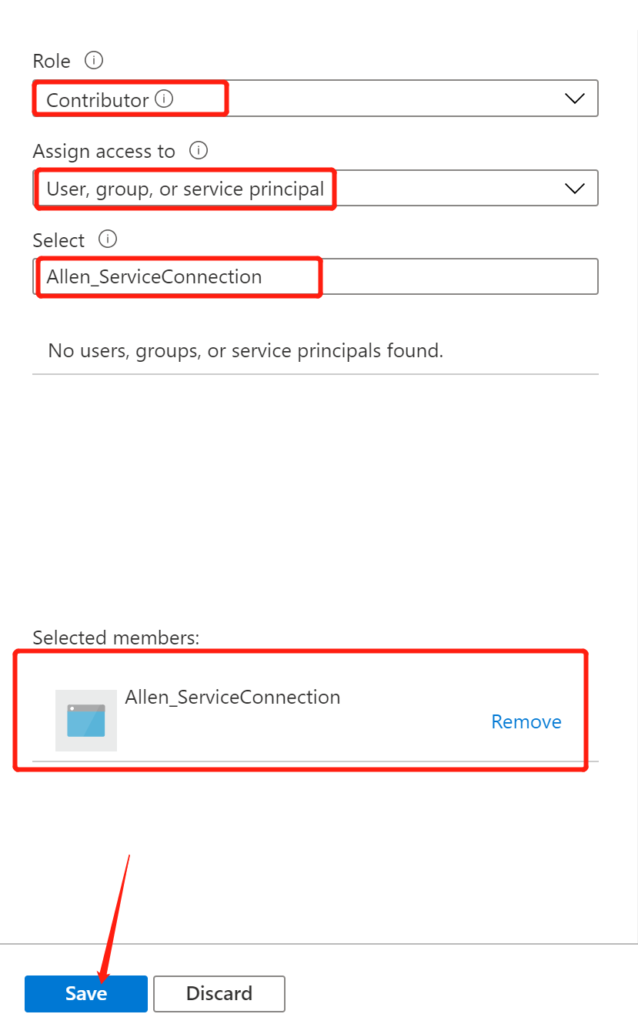
Enter the relevant role assignment parameters
Role selection:’Contributor’
Assign access to: “User,group,or service principal”
Select input: “Allen_ServiceConnection”, and select the current member
Click “Save” to save
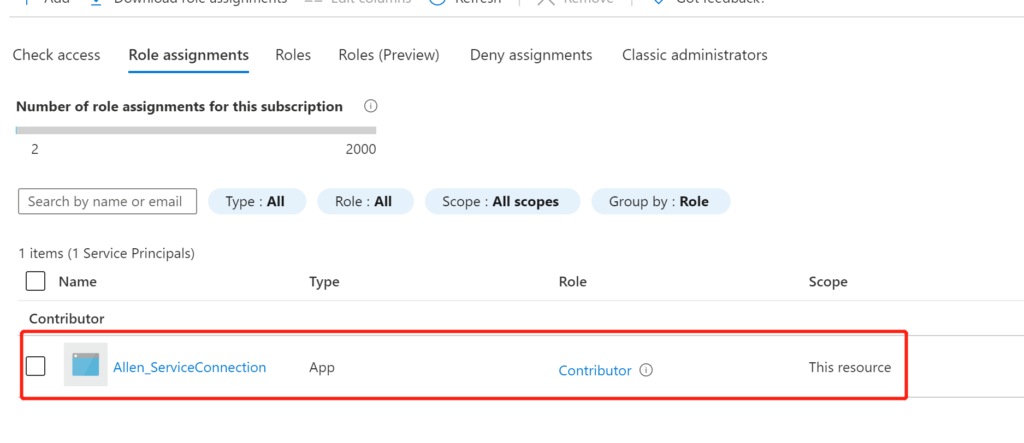
At the same time, we can see the added information on the current role assignment page
2. Create a Service connection in Azure DevOps
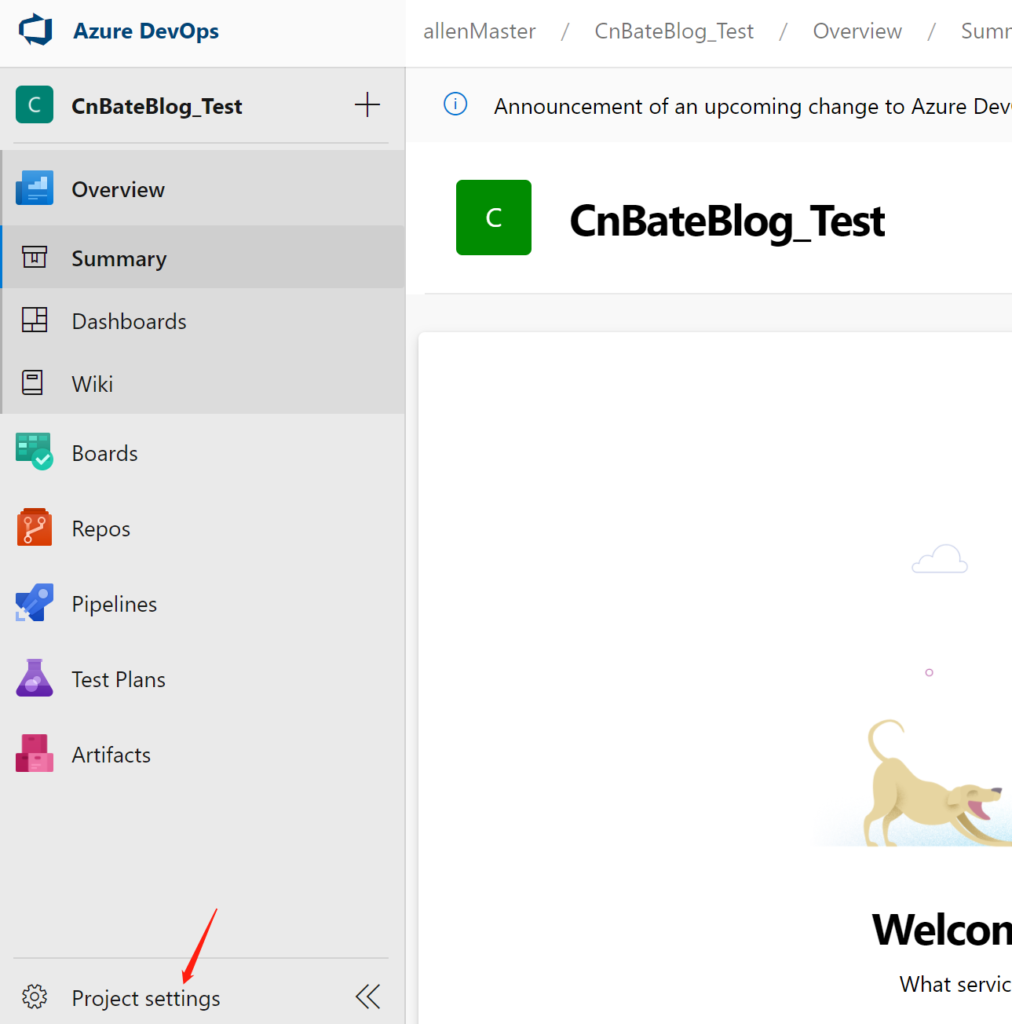
We try to create a new project “CnBateBlog_Test” and click on “Project Settings” in the lower left corner
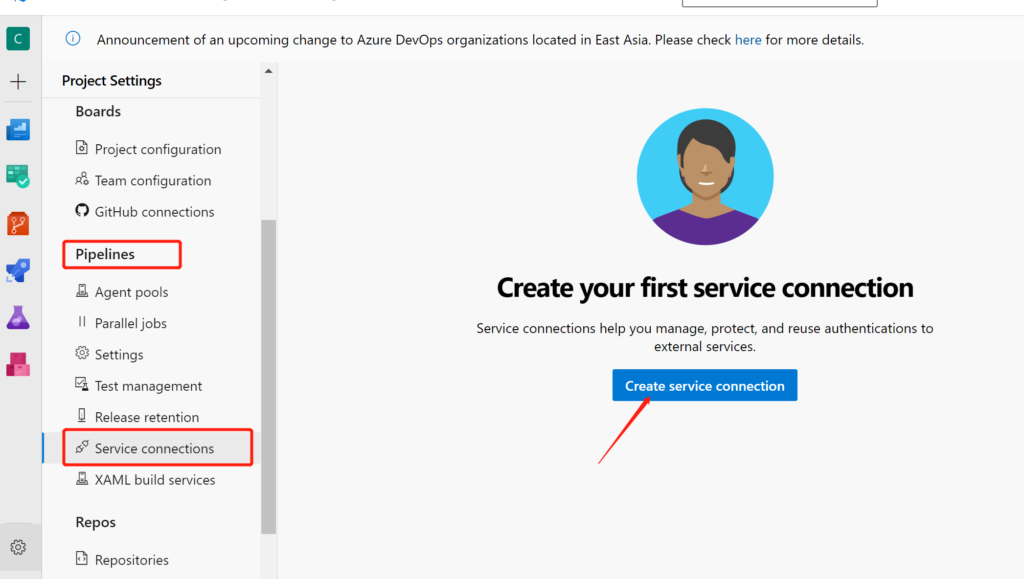
Find “Pipeline=”Service connections” and click “Create service connection”
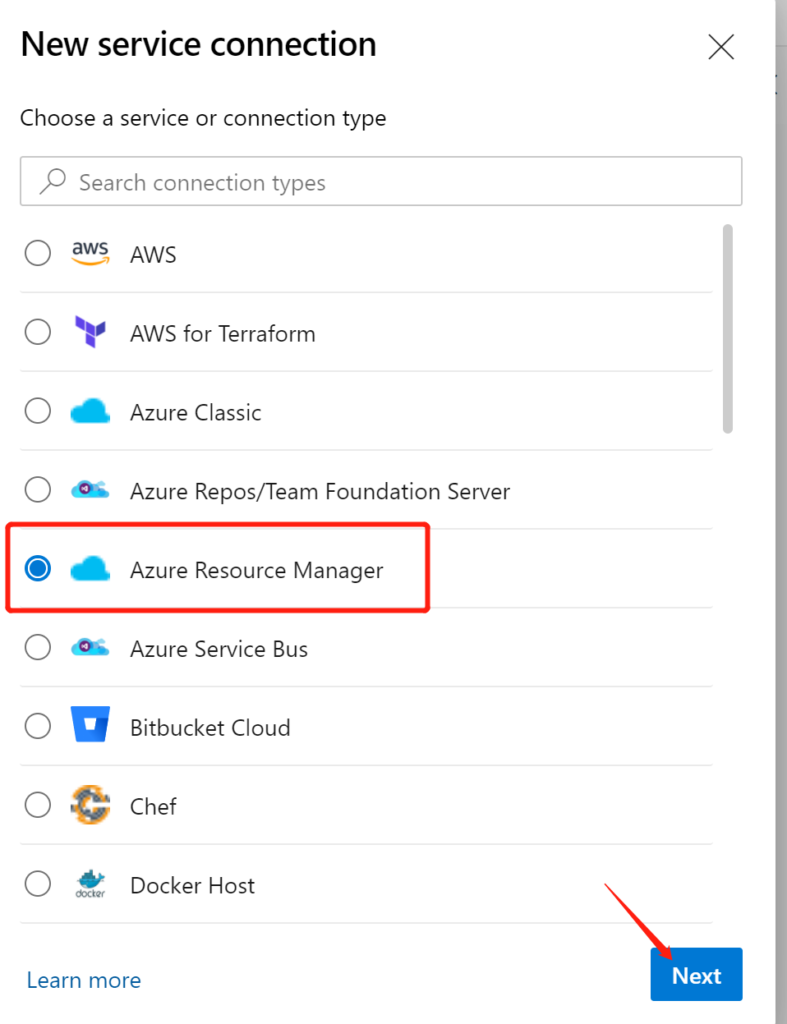
Select “Azure Resource Manager” and click “Next”
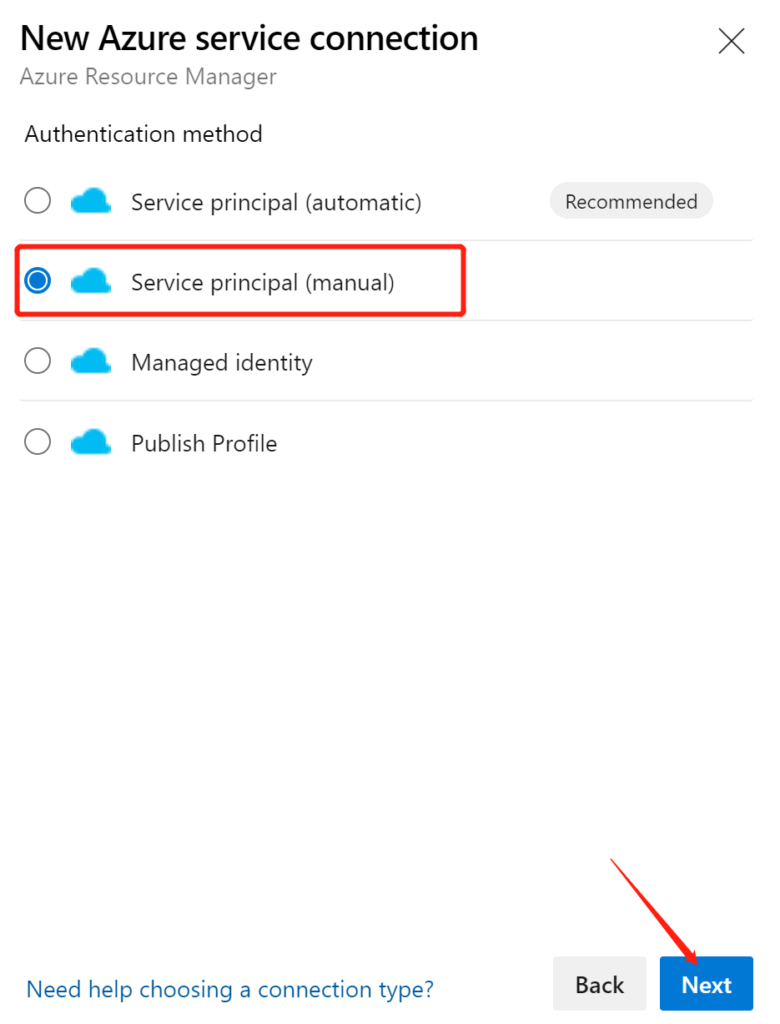
Authentication method (authentication method) Select “Service principal (manual)”, click “Next”
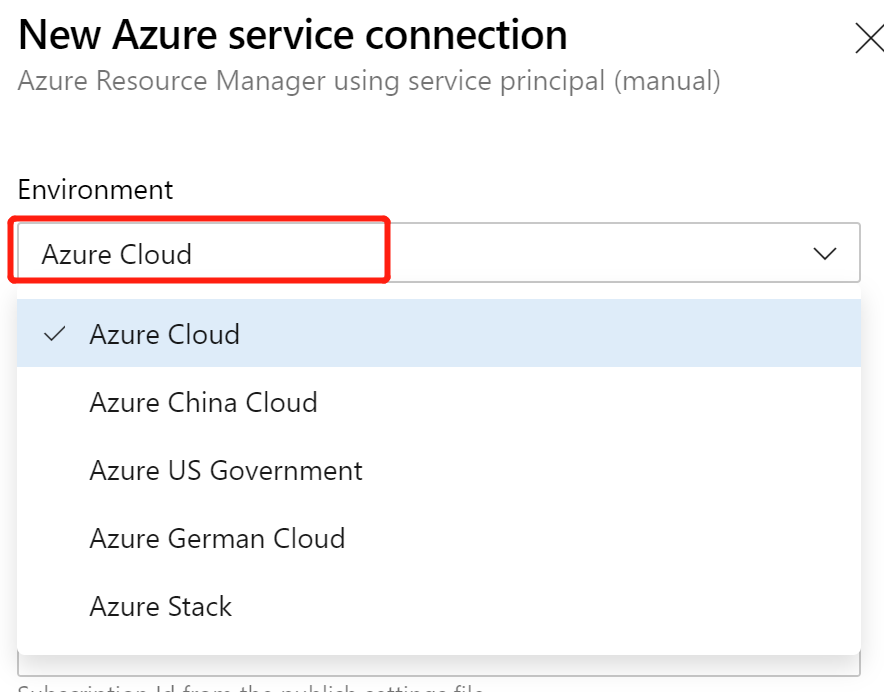
What everyone needs to pay attention to is that if you choose your Azure environment, if you are the same as me, then you can choose the same “Azure Cloud” as me.
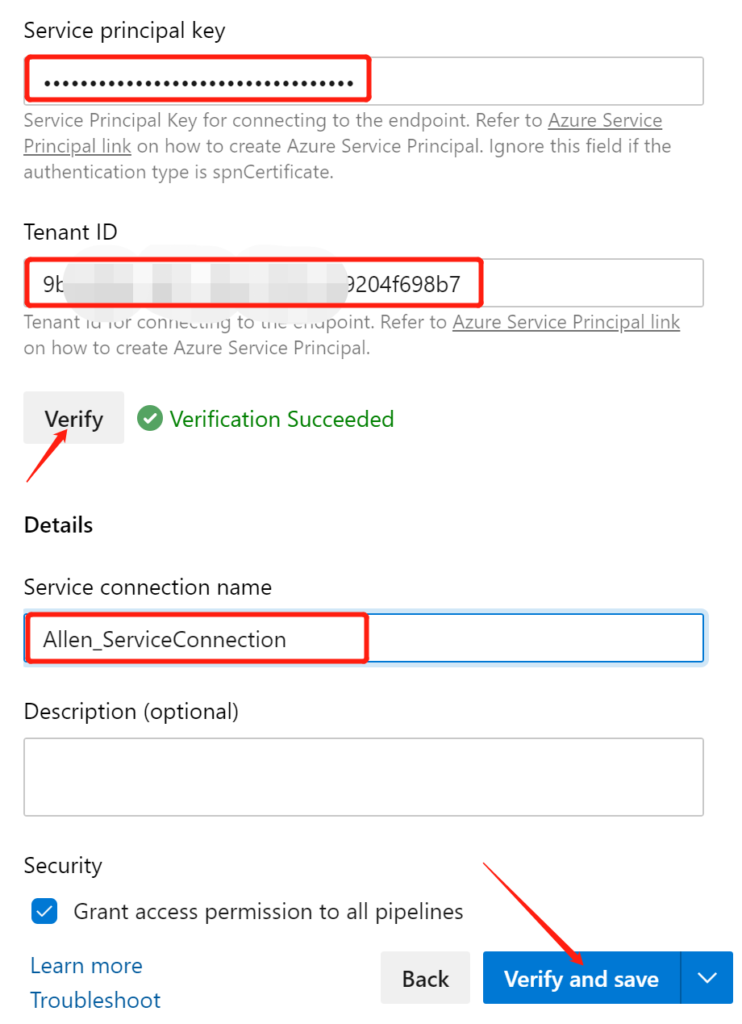
Next, you need to enter the information of the Service Pricipal just created
Scop Level selection: “Subscription”
Subscription Id: ” xxxxxxxx ” (own subscription ID)
Subscription Name: ” Visual Studio Enterprise ” (enter your own subscription name)
Service Principal Id Enter the Id of the App just registered in Azure Active Directory
Credential selection: “Service principal key”
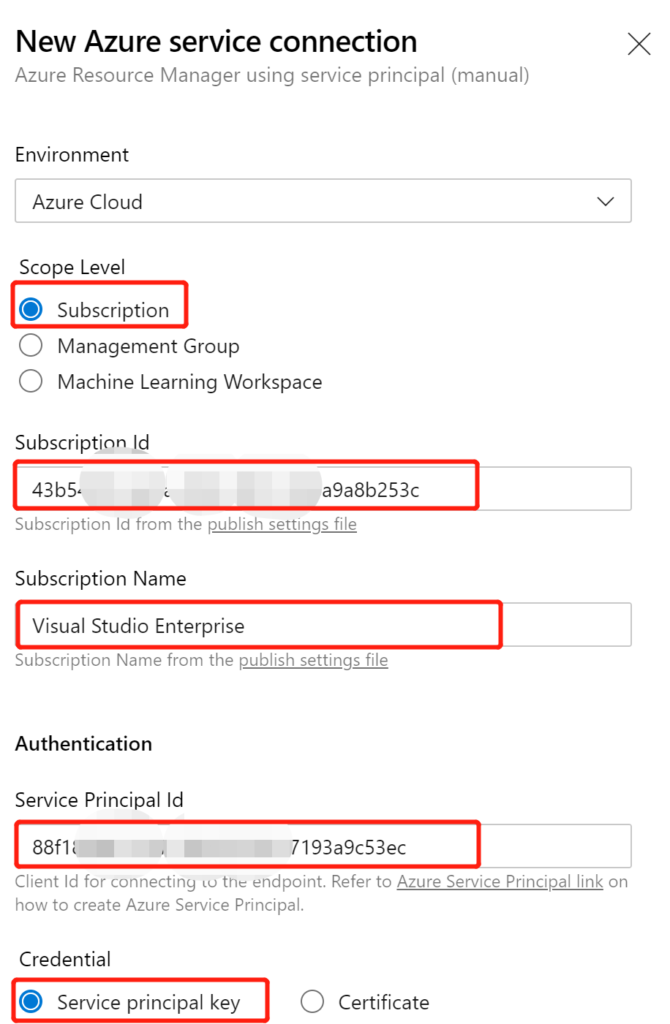
Service principal key is the Client Screct of the application just created
Tenant ID: “The tenant id of the current sp”
After entering the information of sp, we can first click “Verify” to verify it, and then enter other parameters if there is no problem
Service connection name: “Allen_ServiceConnection”
Click “Verify and save” ( before saving, we have to ensure that the information of sp manually entered is correct )
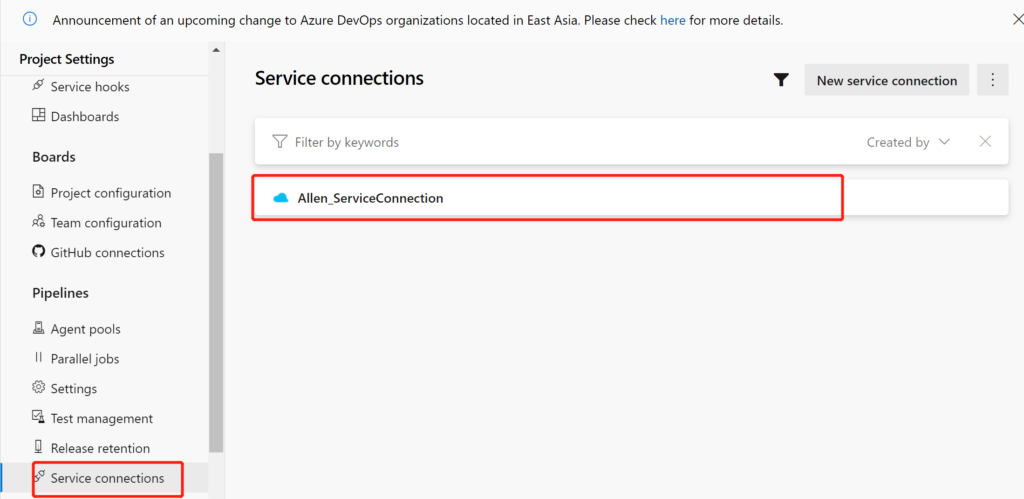
After verifying and saving, we can see the manually created Service connection
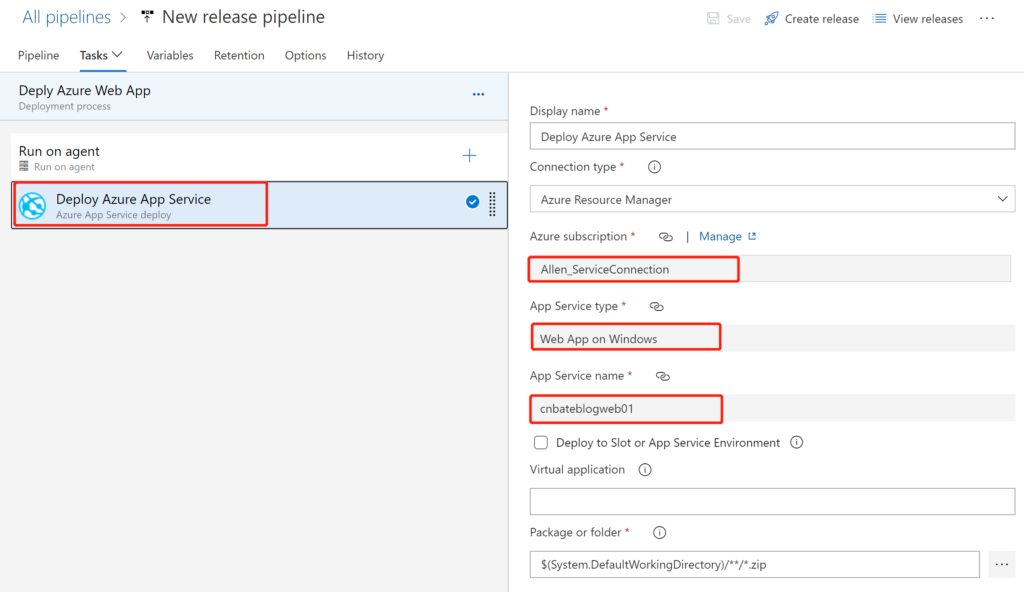
3. Verify the availability of Service connection
The test item is still CnBateBlogWeb
Create a Release Pipeline in Azure DevOps and set related parameters
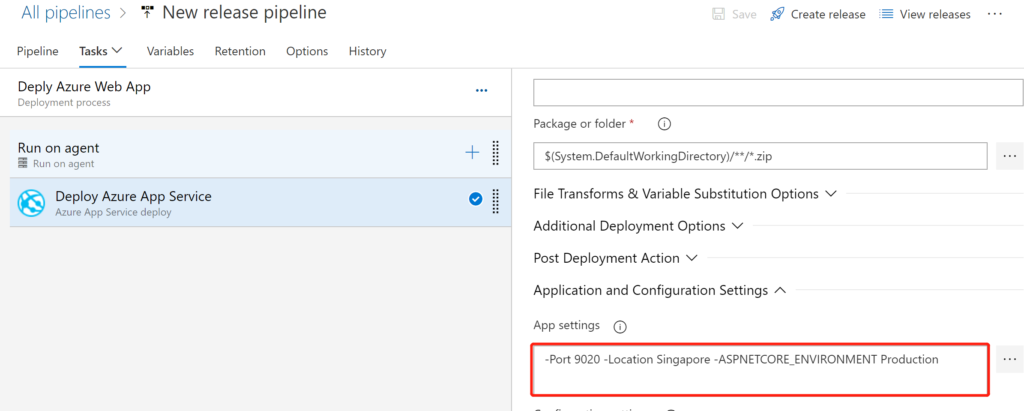
Remember to configure App Settings information, and finally click “Create release”
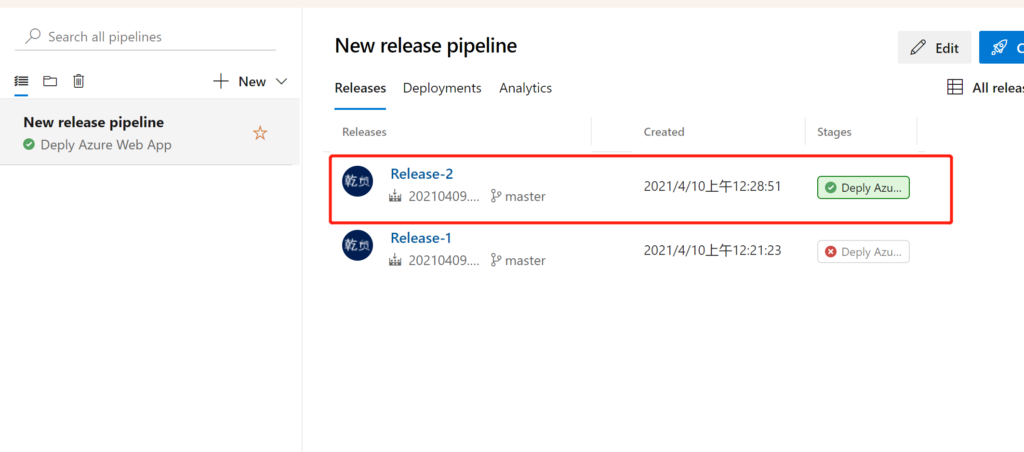
After waiting for the deployment to complete, we first check the deployment status
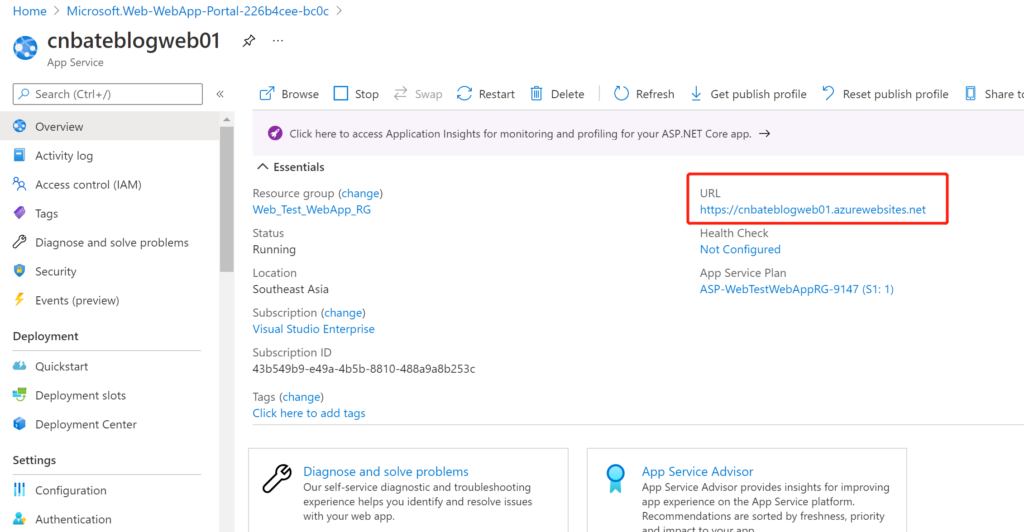
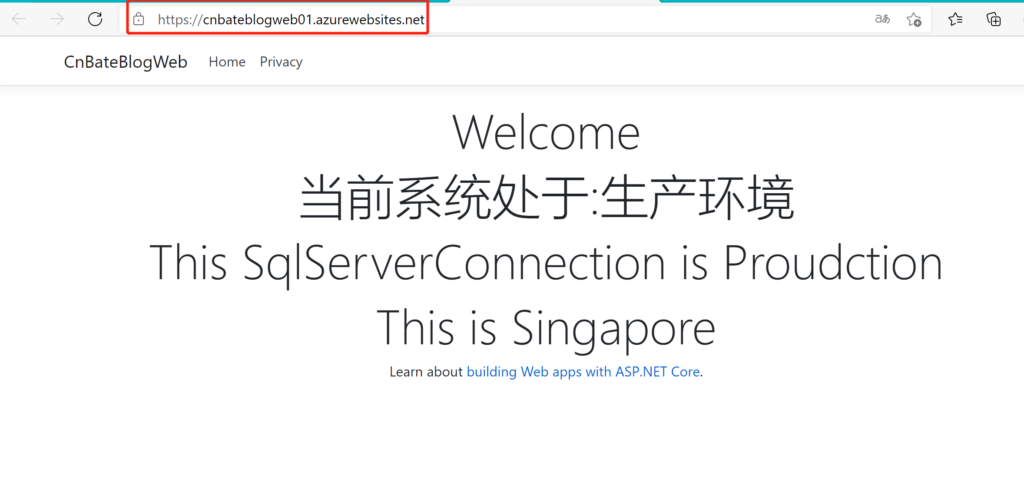
And copy the URL of “cnbateblogweb01” and try to access in the browser
The visit is successful! ! !
Three, the end
Reference material: Azure Pipeline , management service link
github: https://github.com/yunqian44/CnBateBlogWeb
Author: Allen.
Reference: https://www.cnblogs.com/AllenMaster/p/14639395.html


